Below is the easiest way I found to implement extensions in NAV.

NOTE: Before we continue, please note that,


Let's Start!

The above diagram shows how extensions work and the idea behind bringing extensions into existence. Extensions can be installed independently on different tenants belonging to the same service and each tenant will have only the functionality of the extensions installed on it.
Extensions can co-exist in a tenant and independently as well. In the above diagram Extension 1 and 2 are installed on Tenant 1 and Tenant 2. While Extension 3 is only installed on Tenant 3 and likewise.
7 Easy steps to implement extensions in NAV are as follows:
- Original or Unmodified are one and the same thing.
- I will work with NAV 2016 first version. The cumulative updates have some issues when we install an extension on them. The build number is shown below highlighted in yellow.
Step 1 - Export modified objects and original objects separately to MODIFIED & ORIGINAL folders separately.
For this post I am going to use Location Table, Location Card and a New Codeunit (named 'Subscriber Events Mgmt').
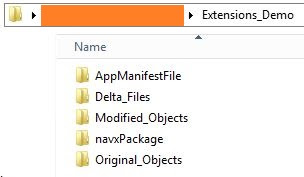
Step 1.1 - To avoid confusion, create folders as shown below, somewhere in your PC.

Step 1.2 - Determine the objects you are going to modify and export these objects in text format separately to 'Original_Objects' Folder. I will export Location Table and Location Card.

Also, export these unmodified objects in FOB format somewhere in your PC. After we modify these objects and export the modified objects in text format, we need to import the unmodified objects back into NAV. After all, that is what extensions is all about - No modifications in C/AL and we still get our way with customizing NAV.
Step 1.3 - Modify the objects. I have added 2 new fields in Location Table and Location Card as shown below,
Location Table
Location Card
Step 1.4 - Now I will create a new Codeunit and add a new function in it named 'OnLocationAfterInsert', the properties of this function are shown below,
Now, the code which I have added in this function is shown below,

In case you do not know, The parameters are added by the system itself once we select a value in the EventFunction property of a subscriber function.
Step 1.5 - Export these modified objects separately in 'Modified_Objects' Folder.

Step 1.6 - Import the unmodified objects FOB which was exported by you in step 1.2 back into NAV and delete any new objects you have made in the process. In this scenario Codeunit 50000 is the new object.
Step 2 – Run PowerShell ISE as Administrator and Import NavModelTools into it. If you do not have an idea check How to import nav model tools to powershell.
Step 3 - Create Delta file.
Step 3.1 - Copy 'Compare-NAVApplicationObject' and paste this in Name text-box under Commands tab in PowerShell ISE. A window like below will show up.

Step 3.2 - Double-click on the text highlighted in yellow in the picture above. Parameters tab will show up just below the highlighted area as shown below. Enter the following information in Parameters:
- DeltaPath (Newly created Delta files will be stored in this path),
- ModifiedPath (the path where modified objects in text format exist),
- Original Path (the path where unmodified objects in text format exist).
I have already entered this info and a screenshot is shown below,

Step 3.3 - Hit Run highlighted in orange. And and output like below will appear.

Also, check the Delta files created in the path mentioned by you in the DeltaPath in Step 3.2.

Step 4 - Create Manifest file.
Step 4.1 - Copy 'New-NAVAppManifest' and paste this in Name text-box under Commands tab in PowerShell ISE. A window like below will show up.

Step 4.2 - Double-click on the text highlighted in orange in the picture above. (Forget the light green highlight for now, we will use it in step 4.5.) Parameters tab will show up just below the highlighted area as shown below. Enter the following information in Parameters:
- Name (Name of your extension)
- Publisher (Your co.'s name or whatever you like)
- You may enter Description and Version as well, I will leave them blank for now.

Step 4.3 - Hit Insert highlighted in orange. Do not run at this moment, this applet needs to run in combination with another applet mentioned in Step 4.5.
Step 4.4 - Add | at the end of the command inserted in the dark blue area. The command will look like shown below,

Step 4.5 - Double-click on the text highlighted in light green in the picture shown in Step 4.1. Parameters tab will show up just below the highlighted area as shown below. Enter the following information in Parameters:
- Path (Newly created Manifest File will be stored here.) This Path has 2 parts:
- First is, Underlined in Red in the picture below, this is the path where you want to store your Manifest file.
- Second is, Underlined in Light Blue, this is the name of your manifest file. Add .xml at the end like I have done shown below.

Step 4.6 - Hit Insert highlighted in orange. Now place your cursor at the end of the just inserted command and hit Enter.
Open the path which was entered by you to store the Manifest file and you will be able to see an XML file there like the one shown below,

NOTE: Manifest file is a file which carries the info like Name, Publisher etc. of the extension. We entered this info in Step 4.2.
Step 5 - Create .navx package.
Step 5.1 - Copy 'Get-NAVAppManifest' and paste this in Name text-box under Commands tab in PowerShell ISE. Double-click on the applet which shows up. In the Parameters tab enter the following information in Parameters:
- Path - Enter the path of the Manifest file which was created in Step 4.6.

Step 5.2 - Hit insert and Add | at the end of the command inserted in the dark blue area.
Step 5.3 - Copy 'New-NAVAppPackage' and paste this in Name text-box under Commands tab in PowerShell ISE. Double-click on the applet which shows up. In the Parameters tab enter the following information in Parameters:
- Path (Newly created navx Package will be stored here.) This Path has 2 parts:
- First is, Underlined in Red in the picture below, this is the path where you want to store your Package.
- Second is, Underlined in Light Blue, this is the name of your Package. Add .navx at the end like I have done shown below.
- SourcePath - The path in which the delta files exist which were created in Step 3.3.

Step 5.4 - Hit Insert. Now place your cursor at the end of the just inserted command and hit Enter.
Open the path which was entered by you to store the Package and you will be able to see a NAVX File there like the one shown below,

Step 6 - Publish NAV app. This step takes a little time to process.
Step 6.1 - Copy 'Publish-NAVApp' and paste this in Name text-box under Commands tab in PowerShell ISE. Double-click on the applet which shows up. In the Parameters tab enter the following information in Parameters:
- Path - Enter the path of the NAVX Package file which was created in Step 5.4.
- ServerInstance - The Name of the Server Instance on which you want to publish the NAV app.

Step 6.2 - Hit Run and then Get the info about the published app to know if the publish was successful. Copy 'Get-NAVAppInfo' and paste this in Name text-box under Commands tab in PowerShell ISE. Double-click on the applet which shows up. In the Parameters tab enter the following information in Parameters:
- ServerInstance - The Name of the Server Instance on which you published the NAV app in Step 6.1.
Output will show up in the dark blue area like shown below,

Step 7 - Install the app.
Step 7.1 - Copy 'Install-NAVApp' and paste this in Name text-box under Commands tab in PowerShell ISE. Double-click on the applet which shows up. In the Parameters tab enter the following information in Parameters:
- Name - Enter the name of the extension which was given by you in Step 4.2.
- ServerInstance - The Name of the Server Instance on which you want to install the extension.

Step 7.2 - Hit Run and your NAV app is installed on this server instance.
Step 7.3 - Last Step of all - Test the extension by running RTC.
- Open Locations and I have opened table fields for BLUE and we can see the new fields "Created By" and "Created Date".

- Now, insert a new Location. Lets enter TEST in Code and hit enter. The result looks like below,

And we're done with implementing the Extension in NAV. The process is bit long but the results are really cool. I do not have any code in C/AL, no modified objects and still I am working in a customized system.
Keep Learning!!
Ishwar :)
#KnowledgeForNAVTechies
#KnowledgeForNAVTechies
Guys, share your comments, doubts and thoughts. I will be glad to help and share more knowledge.
ReplyDeleteHi Ishwar, Nice write-up. "I do not have any code in C/AL, no modified objects and still I am working in a customized system."
ReplyDeleteNow lets say you have to remove these newly added field, how will you do it? Will you have to remove extension/s from this instance?
Hi Dhan Raj, thank you for your comment.
DeleteI did not remove these newly added fields. After modifying the table, I export it in text format in the Modified_Objects folder and then I import the unmodified FOB object file back into the system.
Check Step 1.2 in this post. I hope this answers your question.
Another question: Can we identify whether the field/ customization is actually there in C/AL code or is it because of extension without actually going into design of object? Are these new added fields anyway different than normal (classic way of adding) fields?
ReplyDeleteI would not say we can identify explicitly.
DeleteLet me explain with an example - We have an extension 'E' installed on a NAV Service 'Example90'.
This 'Example90' server Database 'X'.
In this extension we have added a field in Customer Table (Field Name - Created Date, ID - 50000).
Now, if we try to create a field on 50000 ID in Database 'X', since the extension 'E' is already installed on 'Example90' which serves 'X', NAV will not allow us to add a field and an error/warning will pop up when you try to save the table in compiled form.
Try it, if you do not get this error, I will guide you through a series of steps to replicate.
Thanks.
How do you handle for copy document if we use "Created By" on "Sales Header" and using your extension? Can you make it without customization?
ReplyDeleteEg. Sales Quote "0001" is created by is User "E" and then user use copy document function and copy the document Quote "00002" is created by user is "D". You cannot overwrite on "Created By" when user use the copy document. Can you do that without customization on "Copy Doc." CU and using your extension.
ReplyDeleteHello Anonymous, This post is to show how Extensions work. However, you are correct in your point but that is not what I am trying to accomplish through this post.
DeleteAt the moment, there isn't any publisher in the Copy Documents Mgt which might help us, but we may expect some publishers in NAV 2017 which let us do customization like this, till then we gotta wait.
Thank you for your comment!
Thank you for the post. I have few questions,
ReplyDelete01. Where does the new field data been saved? In the step guide you import back the original objects to the database. Which means table is been modified back to =original state.
02. Does the extension add new fields to the table?
03. What will happen to the data if after sometime company deiced to discontinue the extension?
1. The data is saved in SQL itself. When you install the extension on a particular tenant which is mounted on a particular NAV Service, this NAV service is attached to a SQL database in which the data of the fields is saved.
Delete2. Yes, once the extension is installed the fields are added to the table. Note that these fields will not be visible to you in development environment. And when you try to add new fields on same ID's on which some fields were already created, NAV will warn you if a particular extension has fields on the same ID installed on the same Tenant.
3. When you uninstall an extension from a tenant, in the uninstall cmdlet there is an option to save data. Check https://msdn.microsoft.com/en-us/library/mt584146(v=nav.90).aspx for details.
Hope this clarifies your doubts.
Thanks a lot for your comment. It gave me a chance to do some more research! :)
And yes, please share your thoughts if you have also done your research. Thanks again.
DeleteHi everyone, If any one of you runs into the error shown below
ReplyDelete"New-NAVAppPackage : The package contains changes to the database schema that are not handled in upgrade code."
Please check this link below to resolve your issue.
https://community.dynamics.com/nav/f/34/t/212647
I notice if we add new action in standard page cannot package in extension. How to handle this if we really need add extra action menu in standard page ?
ReplyDeleteYes there are many limitations when working with extensions in NAV 2016. But the capabilities of extensions have been increased in NAV 2017. To check the details, go to this link > https://msdn.microsoft.com/en-us/library/mt574414(v=nav.90).aspx
DeleteFor the page action i haven't tested it myself. I think it is another limitation with extensions. I will check and update you soon.
If we need inherit fields from sales order to posted entry table we normally will modified codeunit. How to avoid this ? Because I don't see any standard event can implement this.
ReplyDeleteAny idea
I am waiting for an event like that in standard NAV myself. There are many changes which have been made in codeunit 80 in NAV 2017. Check this link http://ishwar-nav.blogspot.in/2016/11/code-changes-nav-2016-to-nav-2017-tips.html?m=1
DeleteSuch changes, i hope, are made to introduce new events which can be used for the scenarios like the one you have mentioned.
Let's wait for some cumulative updates of NAV 2017.
Hi Ishwar Sharma,
ReplyDeleteDo you try before add new event in standard NAV table. I notice that Extension not allow us to package it if we do modification in standard object. Because if we don't modified standard object not all the customization can do. Is it good time for us to move to extension ? (tried in NAV 2017)
The answer to this question depends upon some factors like,
Delete1. Are you willing to narrow down the current scope of your customization?
2. The developers will have to work around for some developments which have been made by them in the system.
3. Moving to extensions for some clients requires re-implementing the whole project.
These are my own views and suggestions. According to which I think that you must wait some more time before moving to extensions.
Thanks.
I notice that when the solution package in Extension ,we no longer can do report amendment in Production database ? Is it because all the table package as hidden in virtual table. am i right ?
ReplyDeleteCould you make your question more clear? Did you add some new fields to a table and then packaged it in an extension?
DeleteThanks.
Yes.
DeleteI added new field to Table then package it. Later i deloy the install extension to production database.
DeleteNow i start create new report pull the fields that i added in packaged in extension i could not found the fields ? is it one use Extension not allow us do anything thing in production db ?
No, you will have to package the new report as well in your extension in which you packaged the new field. The fields added and packaged in other extensions won't be visible to you in AL code or in reports. Let me know if you find a work around for this.
Deletethanks Ishwar
DeleteYou're welcome! :)
Delete